|
|
| Home | Products | Purchase | Change log & Road map | Gallery | Support | Download | Contact | 中文 |
Home > Documentation for RhinoResurf
Table of Contents 1. Introduction
2. Command Reference
|
Tutorial 5 - Use Fix button to smooth the wavy surface in _RsMesh2Surfs
In this tutorial we will show how to use the Fix button to smooth the wavy surface in _RsMesh2Surfs ( Nurbs from mesh functionality).
Step 1, Get the sample data file for this tutorial. Download the .stl mesh model from here http://www.resurf3d.com/maindoc/demo/singlesurface/ear/ear_stl.rar and download the .nc curve network file from here http://www.resurf3d.com/maindoc/demo/multisurface/ear/ear_nc.rar . Unzip the two files. You will get two files ear.stl and ear_nc.nc . If you do not have tool to open the .rar file, you can download Free RAR Extract Frog from http://www.download.com/Free-RAR-Extract-Frog/3000-2250_4-10804840.html?cdlPid=10804841
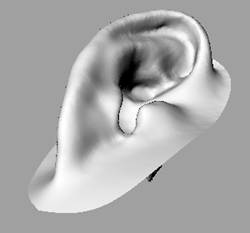
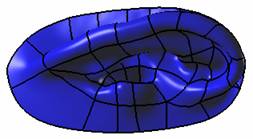
Step 2, Start Rhino and import the mesh file ear.stl. You will see the following picture.
Step 3, Click S urfaces from mesh from the Resurf menu or type RsMesh2Surfs at the Rhino command prompt or click icon
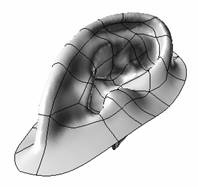
Step 4, In the Nurbs from mesh dialog. Click Open button. Select the file ear_nc.nc, and click Open . The curve net work will show.
Step 5, Click Check button. Wait for several minutes. 57 surfaces will be generated. And the button New, Del and Fit will be enabled.
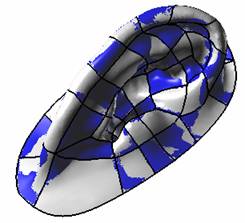
Step 6, Click Fit button. The surfaces will fitting to the mesh, And the button Fix will be enabled .
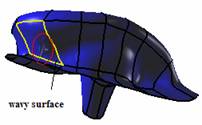
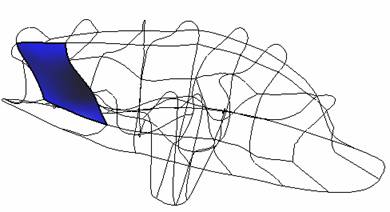
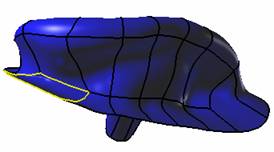
Step 7, At times, there are some undesired surfaces. For example, in this case, there are two wavy surfaces. We need to use Fix button to smooth the two surfaces. Click the checkbox Mesh to hide the mesh, and check the surfaces, you will find the two wavy surfaces. In the following pictures, the yellow highlighted surface is a little wavy and the wavy region is in the red circle.
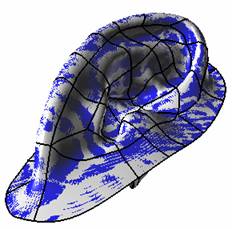
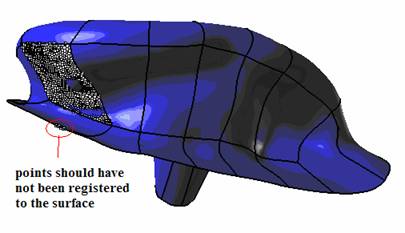
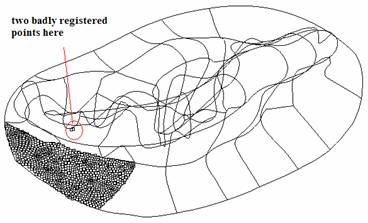
Step 7, Click Fix button. You will see the prompt Select a surface ' , select a wavy surface, and click right mouse button, you will see the points which have been related/registered to the surface. Uncheck the checkbox Face , you will see the points clearly.
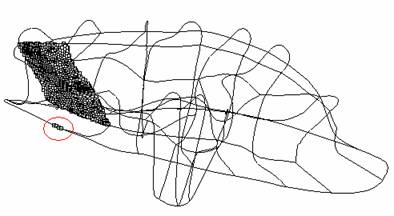
Observe the points, you will find some points (see those points in the red circle in the above two pictures) which should not have been registered to the surface, because they are far away from the surface. This is the reason that the surface is wavy. We should remove the points from the surface (unregister the bad points from the surface). In the Rhino prompt, you will see Select the points which are unrelated to the surface: ', then select the points in the red circle, and click right mouse button, a new smooth surface will generate.
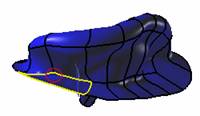
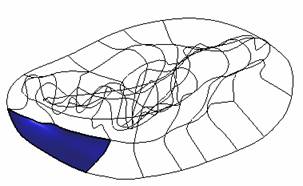
Step 8, Click the Fix button again. Select the other wavy surface. Click the right mouse button, rotate the model and find the badly registered points (see the two points in the red circle). Select the two badly registered points, and click right mouse button, a new smooth surface will generate.
Step 8, After you have fixed the two wavy surfaces. Click Fit button. The new high quality surfaces will generate.
In this tutorial, we learned how to fix the wavy surface before the high quality surface generation. Generally, it is very little chance to get the wavy surface. However, at times, the wavy surface does happen. And this tutorial tells us it is very easy to smooth the wavy surface. |
Copyright (C) 2007-2012 RESURF All Rights Reserved. Privacy Statement |