|
|
| Home | Products | Purchase | Change log & Road map | Gallery | Support | Download | Contact | 中文 |
Home > Documentation for RhinoResurf
Table of Contents 1. Introduction
2. Command Reference
|
Tutorial 15 - Fill hole with surface G1 continuous to neighbor patches
In this tutorial we will show how to fill a hole with surface by selecting surface edges on the condition of G1 continuous to neighbor patches. Command: RsFillHoleBySurf Video:
If the above video is invalid, please click here to download the video
Step 1 : Start Rhino 6/7.
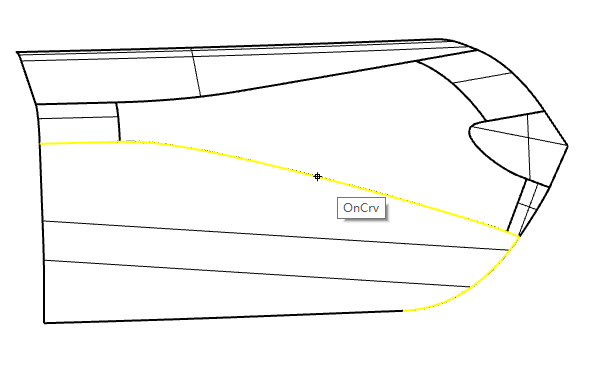
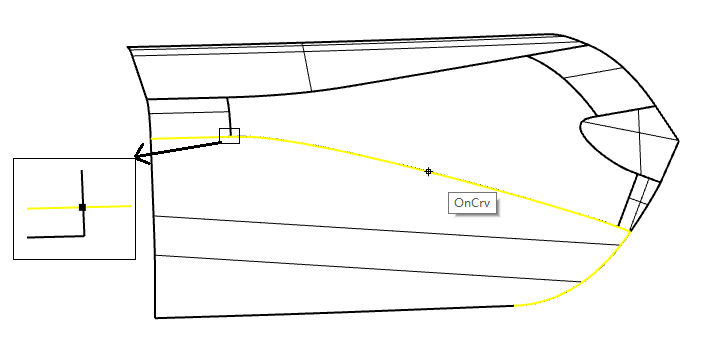
Run command 'SplitEdge' in Rhino command prompt, select one hole boundary line, you will see the following left picture. The yellow curve shows the surface edge where only the hole boundary segment will be used to create hole surface, therefore the other segments should be splitted out. After you splitted the surface edge, you will get the hole boundary line as the yellow curve shown in the following right picture.
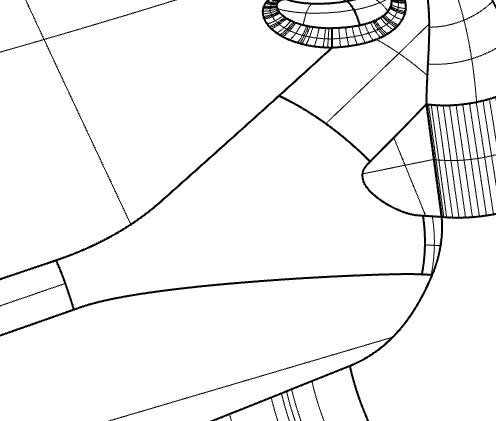
When you split the surface edge, you should be very careful to select the right point on the corner where one surface edge intersects to another surface edge. The following picture shows that we zoom in the hole corner and select the point to split the edge. In this way, we can pick the corner point that is the nearest point on the adjacent surface.
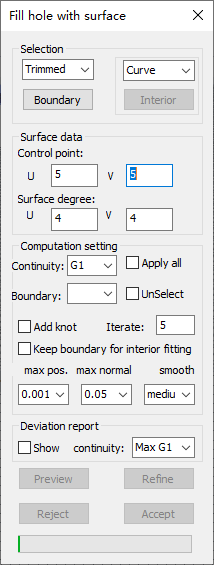
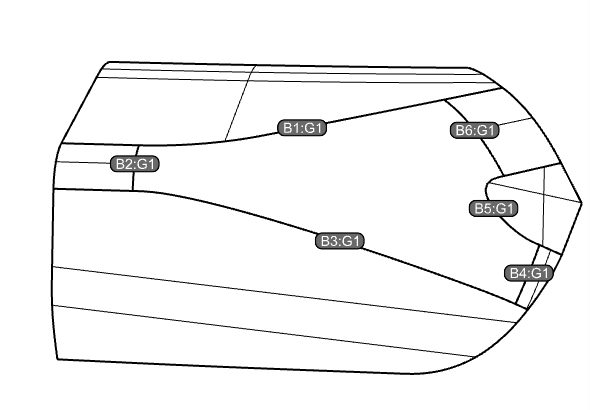
Step 4: Run RhinoResurf command _RsFillHoleBySurf , you will see 'Fill hole with surface' dialog. Click button 'Boundary' and select surface edge or curve. After you have selected surface edges, the edge ID will be added in the choice button 'Boundary' in the dialog, you can select a boundary ID and set the continuity on this boundary by selecting continuity type. For example, you select boundary 'B6', then select continuity type as 'G0', you set G0 continuity on boudnary 'B6'.
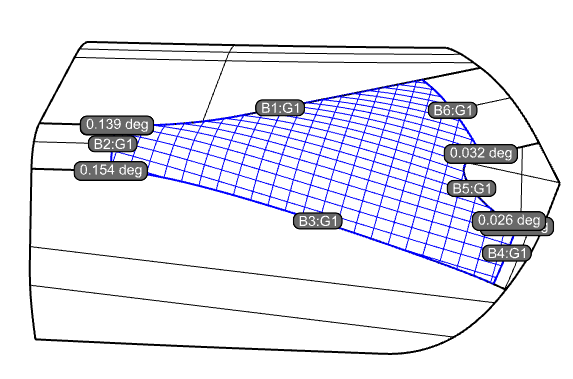
If you are not satisfied with this surface, you can check the button 'Add knot' and click button 'Refine' , the surface will be updated, the maximum norma vector deviation decreased to be 0.09 degree. You can continue to click ' Refine' button to reduce the normal vector deviation. Click 'Accept' button to add the surface into database when you get a satisfactory surface.
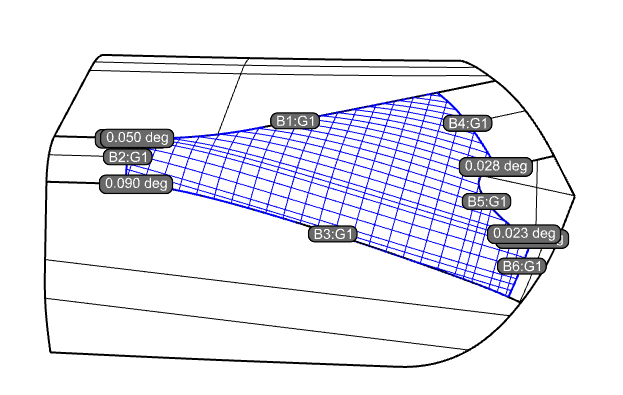
And when you analyze the surface, you will get the following picture and you can see the surface quality.
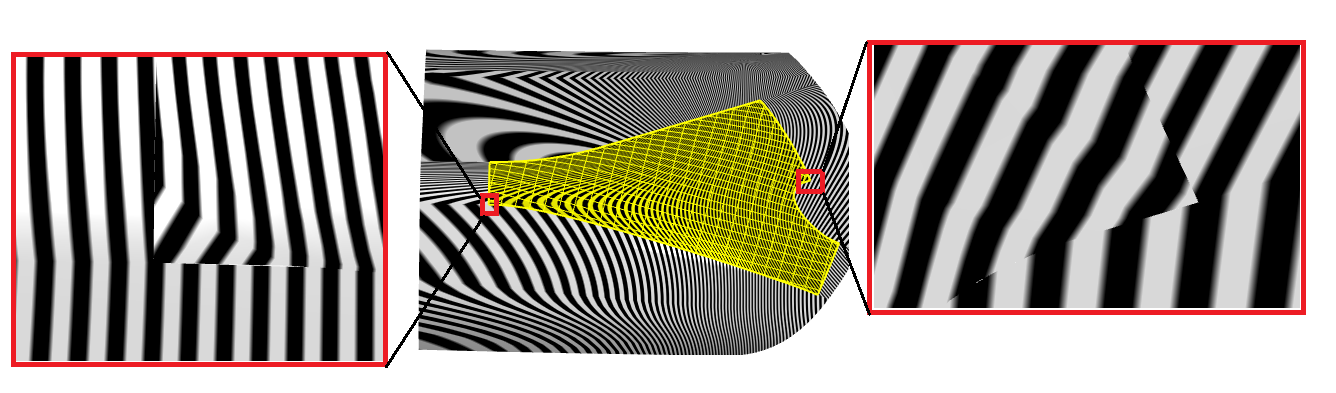
Step 6: Compare RhinoResurf command RsFillHoleBySurf to Rhino command Patch . You apply Rhino command Patch to this same model and analyze the surface by zebra , you will see the following picture, when you zoom in the details, you will find some zebra lines are not continuous, this means the surface is not G1 continuous there.
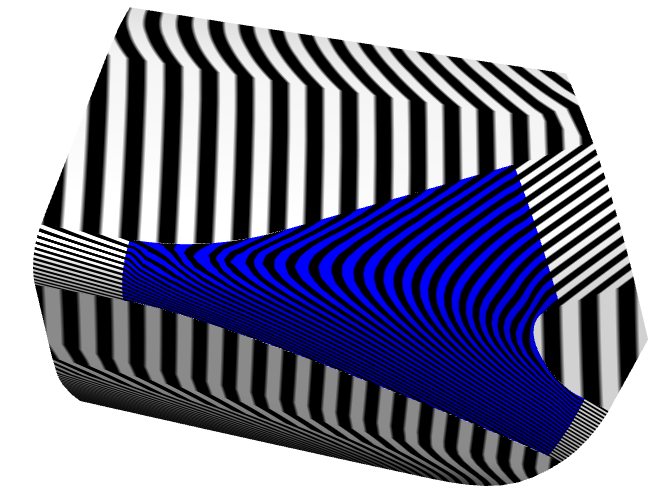
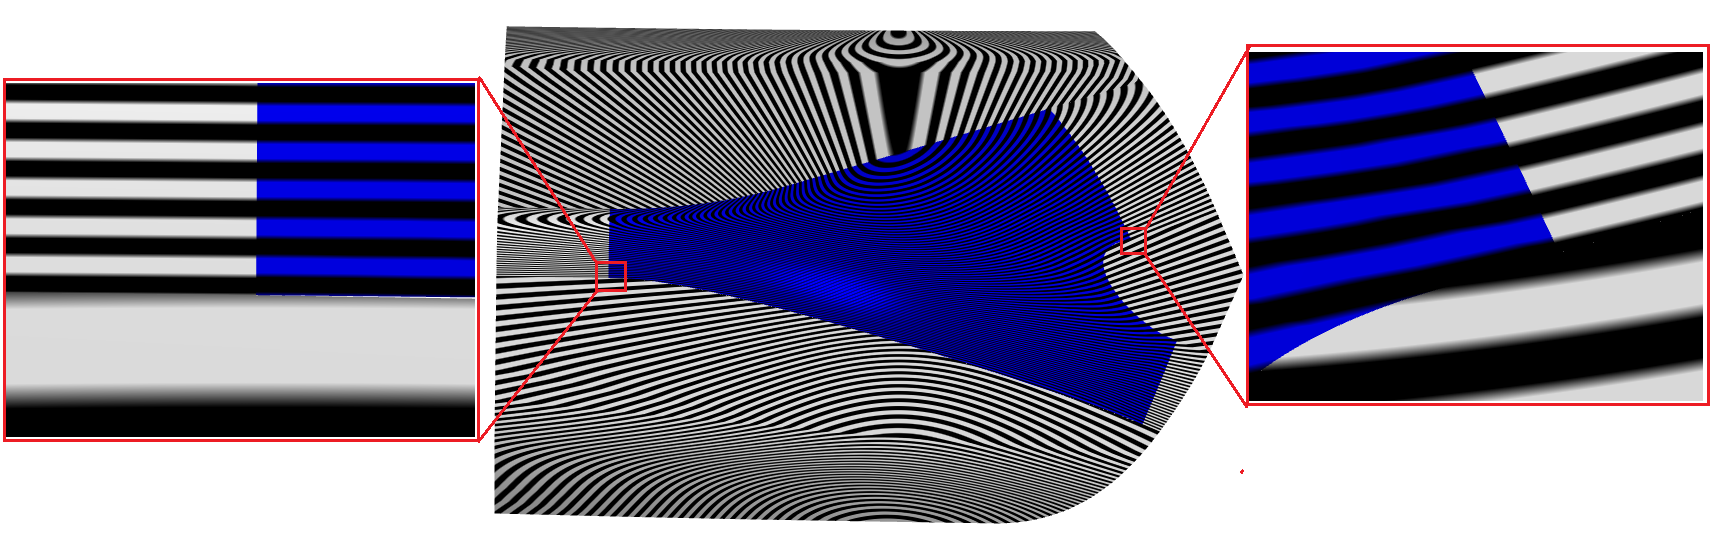
The following picture shows the details on the same position created by RhinoResurf surface, you will see the zebra lines are still continuous when you zoom them in.
|
Copyright (C) 2007-2012 RESURF All Rights Reserved. Privacy Statement |