|
|
| Home | Products | Purchase | Change log & Road map | Gallery | Support | Download | Contact | 中文 |
Home > Documentation for RhinoResurf
Table of Contents 1. Introduction
2. Command Reference
|
Tutorial 16 - Unfold 3D mesh into 2D meshIn this tutorial we will show how to unfold a 3D mesh into 2D mesh. Command used: RsMeshBdryCurves, RsMesh2Surf,Mesh, RsrMeshFlatten
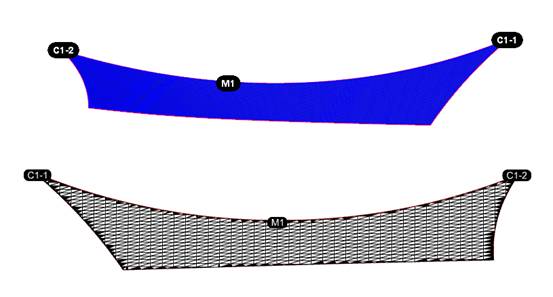
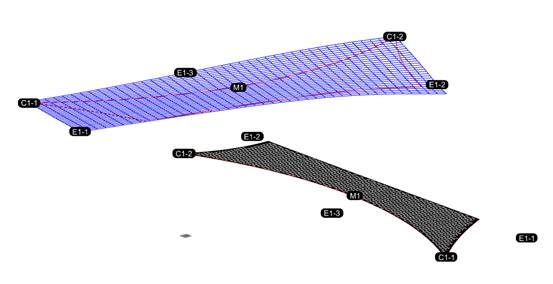
The 3-d mesh and the unfolded 2-d mesh
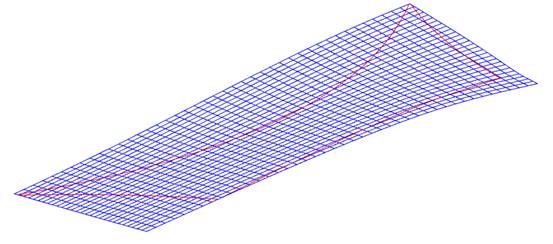
This tutorial presents a solution to unfold a 3-d mesh into a 2-d mesh using RhinoResurf for Rhino. As shown in the above figure, the blue part at the top is a 3-d mesh, and the black part at the bottom is a 2-d mesh after unfolding.
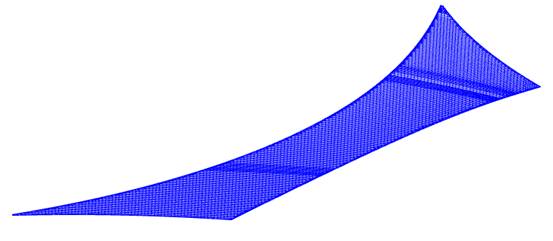
Step 1: Import the mesh model, as shown in figure 1 below:
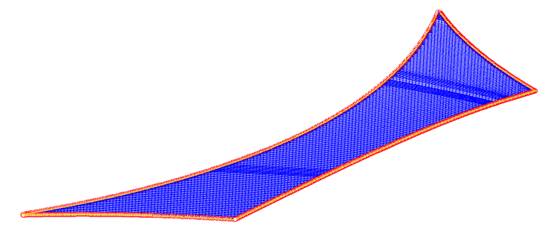
Figure 1. The original mesh Step 2: Generate mesh boundaries. Enter the command RsMeshBdryCurves on the Rhino command prompt (the command is valid only after the RhinoResurf plug-in has been successfully loaded into Rhino), pick up the mesh and click the right mouse button, the boundary is generated automatically.
Figure 2. Boundary lines generated by the original mesh
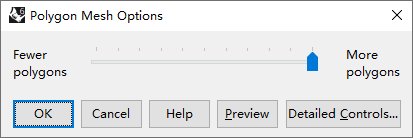
Step 3: Fit mesh to NURBS surface. Enter the command RsMesh2Surf at the Rhino command prompt (the command is valid only after RhinoResurf plug-in has been successfully loaded into Rhino), and you will see the dialog shown in figure 3. You press the button " apply " directly, the program will automatically create surface.
Figure 3. NURBS surface fitting dialog box
As shown in Figure 4, the red part is the result of surface fitting:
Figure 4. The NURBS surface (red) was fitted from the original mesh with a maximum position deviation of 0.054mm
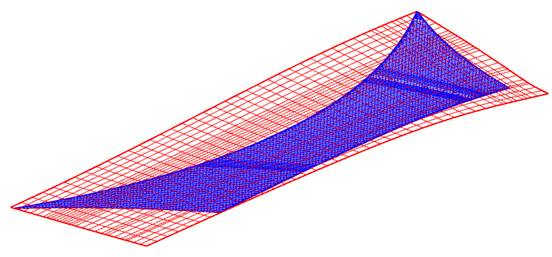
Step 4: Transform the fitted NURBS surface into a mesh. Type Mesh into Rhino's command line, and when you pick up the surface, you'll see the following dialog box in figure 5. Press " OK " to get a new mesh. (See the mesh model in figure 6 below)
Figure 5. Parameter setting interface during NURBS surface generation
Figure 6. mesh model generated by surface
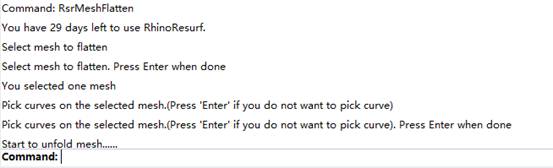
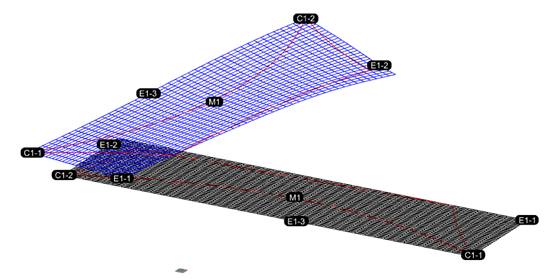
Step 5: Unfold the new surface mesh under the constraint of boundary curve. Type the command RsrMeshFlatten in the Rhino command prompt and you will see a prompt as shown in figure 7 below, which prompts you to select the mesh, then select a curve on the mesh, and then unfold them. You can first select the new surface mesh generated in step 4 (figure 6), then select the original mesh boundary line generated in step 2 (the red boundary line shown in figure 6), and finally click the "Enter" key or the right mouse button to unfold the mesh and curve together. The unfolded mesh model is attached with identifiers, such as "M1", "E1-1", "C1-1", etc. By these identifiers, you can judge the corresponding position relationship between the unfolded 2D mesh and the original 3D mesh.
Figure 7. Command prompt for mesh unfolding
Figure 8. mesh expansion
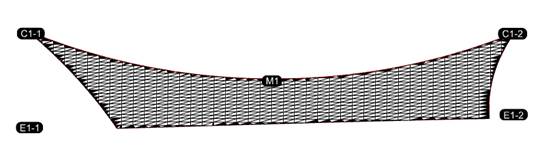
Step 6: Cut out the unfolded 2D mesh according to the unfolded curve. In Rhino command line you input command: MeshTrim , first pick up the red curve in the 2d model, then click right mouse button, then click on any point in the 2D mesh outside of the red closed curve, and the mesh will be clipped along the red curve , the rest of the mesh is the result of the unfolded original 3D mesh (see figure 10).
Figure 9. 2d mesh is cut by boundary line
Figure 10. a 2D unfolded mesh on the top viewport
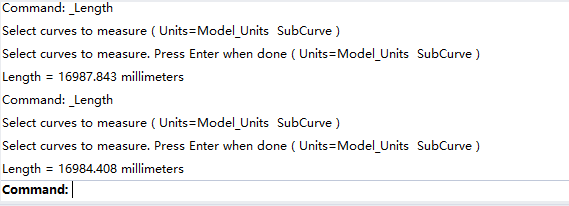
Step 7: Figure out the deformation of mesh boundary length. By calling the Rhino command Length , you can calculate that the mesh boundary Length before unfolding is 16987.8426 mm, and the 2D mesh boundary Length after unfolding is 16985.1642 mm.
Figure 11. Comparison of boundary length measurement between 3D mesh and unfolded 2D mesh
|
Copyright (C) 2007-2012 RESURF All Rights Reserved. Privacy Statement |