 Point cloud to NURBS Point cloud to NURBS
Point cloud to NURBS is a stand-alone application. This software can fit a NURBS surface to a point cloud/mesh by clicking one button. The features include:
1. Import point cloud file formatted by
.pts, .xyz,.txt, .stl, .obj, .rsf;
2. Fit point cloud/mesh to a NURBS surface ;
3. Export the surface to .igs file;
4. Controllable fitting precision. The maximum deviation between points and surface can be specified;
5. Controllable surface smoothness. The surface's smoothness can be adjusted by 5 levels;
6. Handle large scale data. Surface control point number can reach 300X300 which enables the program to fit large scale data, e.g terrain model for survey;
7.Generate mesh from point cloud; Export mesh data to STL file;
8. Easy to use. Just click one button to create surface from point cloud/mesh.
|
|
1. Create curve network on mesh and generate surface in time. Create curve network on mesh and generate surface in time.

Dialog:
After you clicked menu button 'Surface>Create surface on mesh dynamically' (or toolbar icon )you will see a dialog like the following picture:
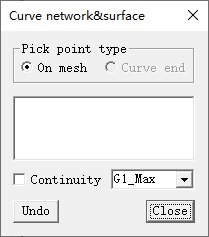
Parameters:
-
Pick point type: the point type which can be picked on mesh.
-
ON mesh: this type allows you pick a point on mesh;
-
Curve end:this type allows you pick a point on the end of a curve.
2. Create curve on mesh. Create curve on mesh.

3. Create surface from 4 curves on mesh and fit the surface to mesh. Create surface from 4 curves on mesh and fit the surface to mesh.
Dialog:
After you clicked menu button 'Surface>4 curves to surface' (or toolbar icon )you will see a dialog like the following picture:
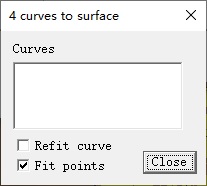
Parameters:
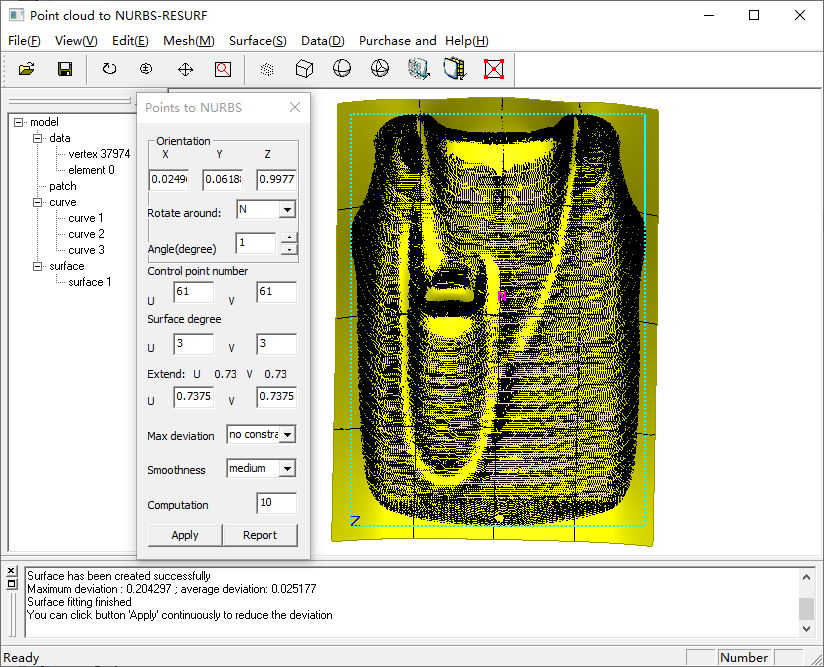
4. Fitting point cloud to NURBS surface . Fitting point cloud to NURBS surface .
Video:
Dialog:
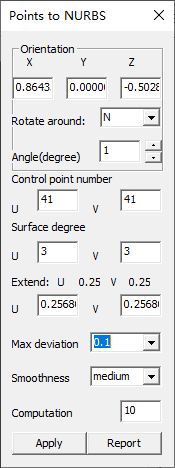
After you clicked menu button 'Surface>Point cloud to nurbs' (or toolbar icon  )you will see a dialog like the following picture: )you will see a dialog like the following picture:
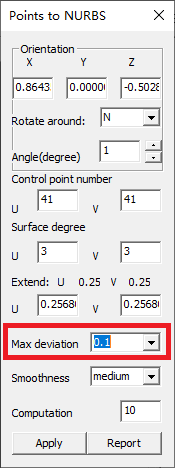
Parameters:
-
Orientation: pull orientation (dx, dy, dz) is the normal of the fitting plane. The orientation is used as a workspace in the fitting solution. The pull orientation determines the quality of surface. Generally, the program will calculate a optimum pull orientation for surface fitting. However, sometimes it may be bad for some cases.Pull orientation lets user change the orientation (dx, dy, dz) for better surface generation.
Rotate around: specify the rotation axis to rotate the fitting plane.
Rotation axis type:
U: A line indicating the U direction in the view.
V: A line indicating the V direction in the view.
N: A line indicating the N direction in the view. For this case, surface fitting orientation does not change, surface U, V-line will change.
-
Angle(Degree): the angle value of each rotation of the fitting plane. Click the up arrow button on the right of the angle text field to rotate the fitting plane counterclockwise; Click the down arrow button to rotate the fitting plane clockwise.
-
Control point number: set surface control point in U-direction and V-direction, this control point number will be used as initial number for surface fitting computation. This is optional , program will compute the reasonable surface control point number as default.
-
Surface degree: specify the surface degree in U-direction and V-direction, the default number is U==3 and V==3 , the maximum degree is U==8 and V==8.
-
Max deviation: threshold for the maximum deviation between points and surface. The levels include: no constraint, 0.5, 0.1, 0.0, 0.001, 0.05, 0.3, 1.0, 0.0001;
-
Smoothness: surface smoothness factor, to choose a smoothness level for controlling surface smoothness quality. The levels include: highest, high, medium, low, lowest;
-
Computation: time limitation for computation, the number is greater, the computation.
-
Apply: click this button to create a surface that fits the point cloud. After you have fitted a surface successfully, you can choose a more little 'max deviation' number and continue to click this for updating the surface with higher precision.
-
Report: click this button to save the deviation values between every points and surface into a .txt file as report.
5.  Fitting mesh to NURBS surface . Fitting mesh to NURBS surface .
Video:
Dialog:
After you clicked menu button 'Surface>Single surface from mesh' (or toolbar icon  )you will see a dialog like the following picture: )you will see a dialog like the following picture: 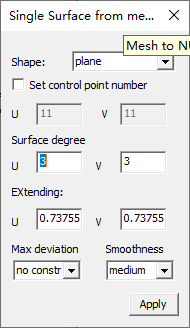
Parameters:
-
Shape: topology shape options for mesh models. If your mesh model is topologically like a plane (which is mathematically homeomorphic with plane topology), choose "plane"; If your mesh model is topologically like a cylinder, choose cylinder.
-
Set control point: this check box allows the user to set the initial control grid point value of the surface, such as u = 43 and V = 23. This button can generate an initial surface for the user, and the user can control and generate the surface on this basis. If the user inputs a reasonable number of control points, it will help to accelerate the speed of surface generation.
User may not care about this check box, and the number of grid control points will be generated automatically.
Surface degree: sets the degree of the surface in the u-direction and v-direction.
-
Extending: set the extension distance of the surface in u-direction and v-direction to make the surface scale larger than the mesh model.
-
Max deviation: the maximum deviation threshold between the surface and the mesh.
-
Smoothness: controls the smoothness of the surface;
-
Apply: click this button to generate a surface. After the surface is generated, if the error between the surface and the mesh is too large, modify the maximum deviation value and click this button again to get a new surface with the error reaching the predetermined value;
6. Generate mesh from point cloud. Generate mesh from point cloud.
Toobar icon :or menu-item:“Mesh->Mesh from points with plane topology"
No dialog.
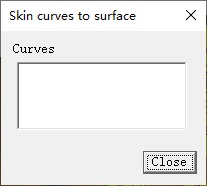
7.  Create surface by skining curves. Create surface by skining curves.
Dialog:
After you clicked menu button 'Surface>Skin curves' (or toolbar icon )you will see a dialog like the following picture:
Parameters:
8.Export data ( After the trial expires, this function can to be activated by registration)
Export surfaces as .igs file; Export meshes as .stl file; Export to a RESURF format .rsf;
Tutorial 1. How to fit a NURBS surface to a point cloud
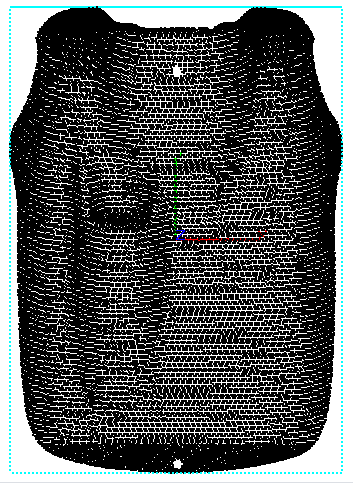
Step 1 : Open the sample file skidoo.xyz . You will see the point cloud model shown as the following picture.
Step 2: Click menu 'Surface->Point cloud to nurbs', the dialog appears. Some parameters for 'Pull orientation' and 'control point number' have been figured out automatically, you can specify new parameter values which you think better or click button 'Apply' directly to create a new surface. After you clicked 'Apply' button, wait for a while, a fitted surface will generate.
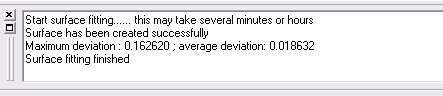
The bottom RESURF output message reports that 'Maximum deviation : 0.162620 ; average deviation: 0.018632'. This means that the maximum deviation between points and surface is 0.16262, the average deviation is 0.018632.
View the surface by rotation:
Step 3: Choose Max deviation as 0.1, continue to click Apply button. The surface was updated.
Resurf output message reports the tolerance as the following picture:
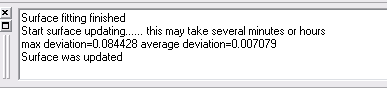
The report tells user the maximum deviation between points and surface is 0.084428 which is under the specified threshold 0.1.
Step 4: Click button 'report' to save the deviation values as a .txt file. The report file is formatted as "point id, point (x, y, z), projected point on surface (x, y, z), uv value(u, v), deviation distance".

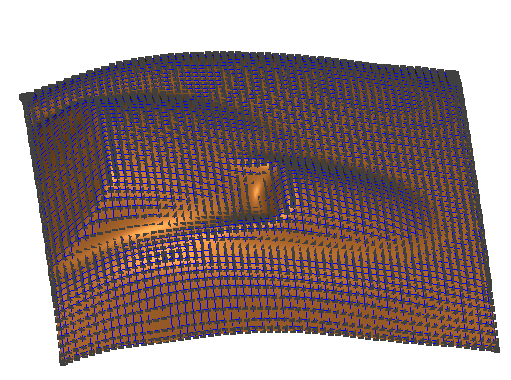
Step 5: Close the dialog. Click menu 'View->mode->Hide mesh' to hide the points, and click menu button 'View->Mode->Show surface CPS' to display surface control point.
Step 6: Click menu 'File->save' to save the surface as .igs file.
|
Tutorial 2. Improve the surface by adjusting 'Pull orientation'
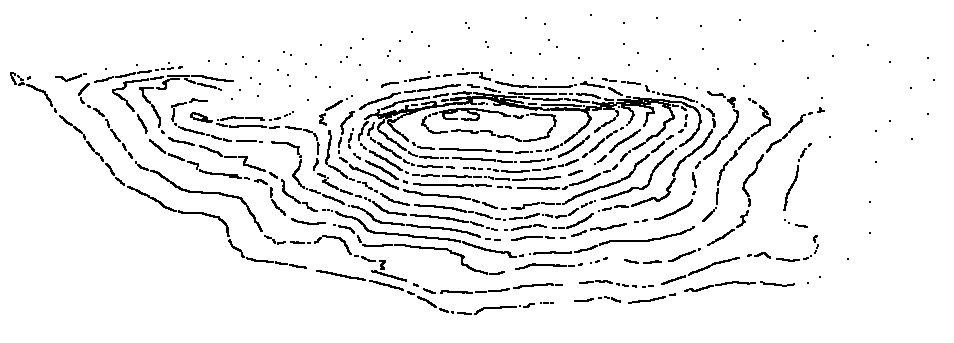
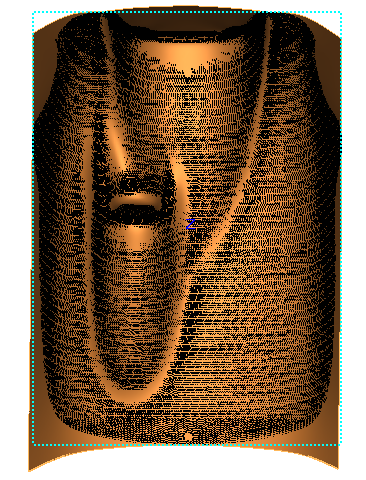
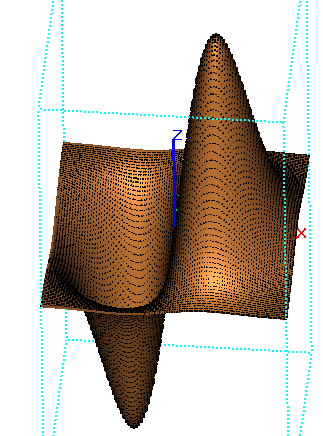
Step 1 : Open the sample file expfunctional.xyz . You will see the point cloud model shown as the following picture.

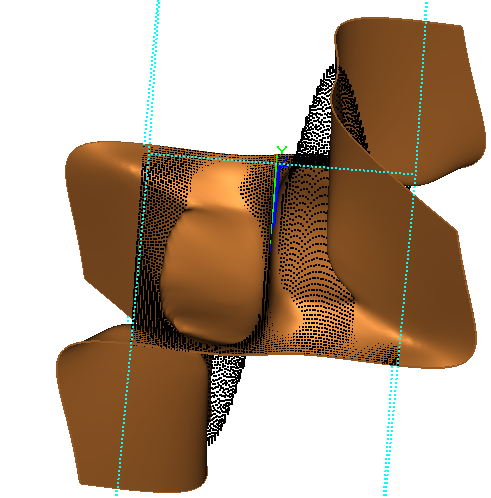
Step 2: Click menu 'Surface->Point cloud to nurbs', the dialog shows. Some parameters for 'Pull orientation' and 'control point number' have been figured out automatically, you can specify new parameter values which you think better or click button 'Apply' directly to create a new surface. After you clicked 'Apply' button, wait for a while, a fitted surface will generate. The following picture is created afte clicking 'Apply' button with default parameter values. However, this surface is not good due to the default 'Pull orientation' vector (0.864, 0.002, -0.503) is not reasonable for this model. After observation on the point cloud model. The best ' Pull orientation' should be (0, 0, 1.0) , so we need to set the ' Pull orientation' to be (0, 0, 1.0) and refit the surface.
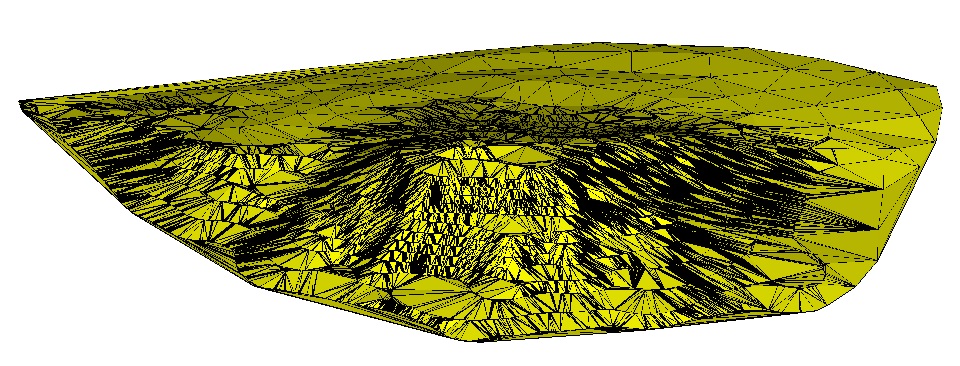
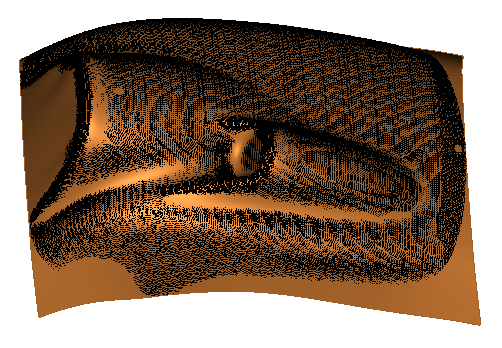
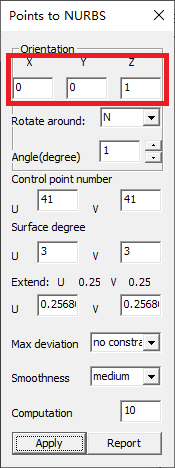
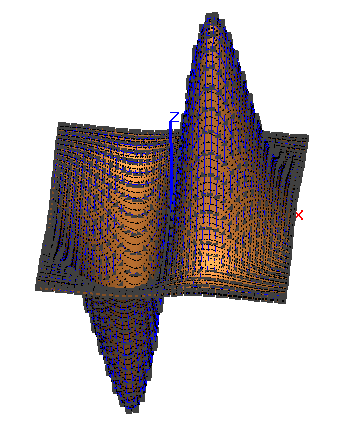
Step 3: Set the Pull orientation to be (0, 0, 1.0) (see the following picture), continue to click Apply button. The surface was updated.
The following picture shows the upated surface, it has been improved now.
The program reports the maximum deviation and average deviation in the output message dialog:

Step 4: Close the dialog. Click menu 'View->mode->Hide mesh' to hide the points, and click menu button 'View->Mode->Show surface CPS' to display surface control point.
Step 6: Click menu 'File->save' to save the surface as .igs file.
|