Automatic STL Mesh-to-NURBS Surface Conversion — Quick Test and Code Integration Guide
Automatic STL Mesh-to-NURBS Surface Conversion — Quick Test and Code Integration Guide
1. Obtain the ResurfAutoNurbsLib.zip archive. If you do not have it, contact Mr. Li at +86 1995 1773 192 or email info@resurf3d.com.
2. Review the contents of ResurfAutoNurbsLib.zip. Extract the archive to obtain the following files:
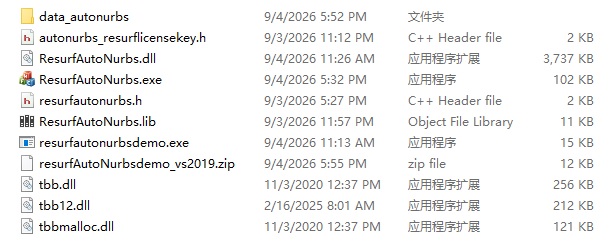
The following files are required to integrate automatic STL mesh-to-NURBS surface conversion into a third-party system:
- ResurfAutoNurbs.dll
- ResurfAutoNurbs.lib
- tbb12.dll
- tbb.dll
- tbbmalloc.dll
- resurfautonurbs.h
- autonurbs_resurflicensekey.h
License activation utility: When deploying the component, use ResurfAutoNurbs.exe to activate ResurfAutoNurbs. The utility displays the following window:
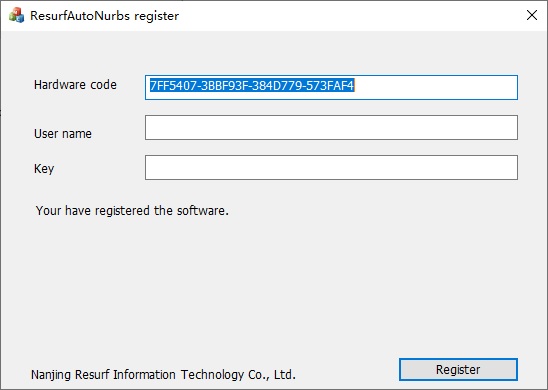
Send your hardware code and username to info@resurf3d.com to obtain a license key.
Test program and sample data:
- The data_autonurbs directory contains sample data; mesh.stl is the mesh model.
- resurfautonurbsdemo.exe is the test program.
How do you test your own data with resurfautonurbsdemo.exe?
- 1). Prepare your STL mesh file and name it mesh.stl.
- 2). Copy mesh.stl into the "data_autonurbs" directory, replacing the existing file.
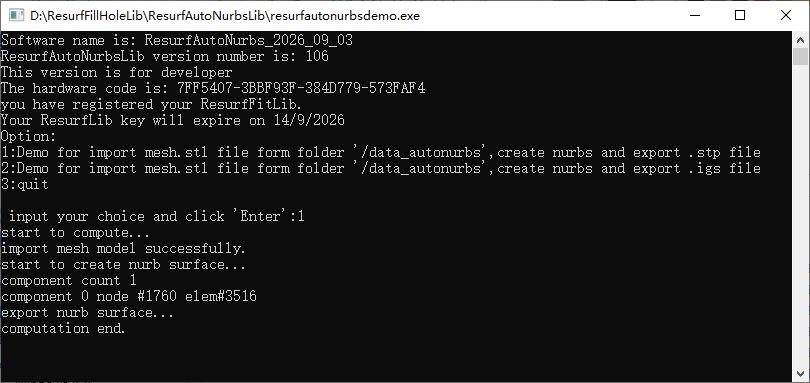
- 3). Run resurfautonurbsdemo.exe, enter "1", and press Enter. When processing is complete, you will see the results shown below. The generated surfaces are exported to "autonurbs.stp" in the same directory as resurfautonurbsdemo.exe.
3. Review the contents of resurfAutoNurbsdemo_vs2019.zip. This archive contains a sample project demonstrating API usage. Extract it and open the project in Visual Studio 2019. The function testAutoNurbs(int type) demonstrates automatic STL mesh-to-NURBS surface conversion.